详解fedora 开启 apache 并 开启目录浏览模式
作者:xuyaowen
这篇文章主要介绍了fedora 开启 apache 并 开启目录浏览模式的相关资料,非常不错,具有一定的参考借鉴价值,需要的朋友可以参考下
在内网中 暂时需要一台 文件 服务器,所以准备安装一台 http服务器并开启目录访问权限。这次使用 apache 在 fedora 28 机器上:
因为 fedora 28 已经包含 httpd 软件,使用systemctl start httpd 就能进行启动。
启动时 默认开启 目录访问权限,但是首次访问网站根目录的时候,会显示test page.
进入如下文件夹:
[root@dhcp-65-15 conf.d]# pwd
/etc/httpd/conf.d
[root@dhcp-65-15 conf.d]# cat welcome.conf
#
# This configuration file enables the default "Welcome" page if there
# is no default index page present for the root URL. To disable the
# Welcome page, comment out all the lines below.
#
# NOTE: if this file is removed, it will be restored on upgrades.
#
<LocationMatch "^/+$">
  Options -Indexes
  ErrorDocument 403 /.noindex.html
</LocationMatch>
<Directory /usr/share/httpd/noindex>
  AllowOverride None
  Require all granted
</Directory>
进行注释上述文件:
[root@dhcp-65-15 conf.d]# cat welcome.conf
#
# This configuration file enables the default "Welcome" page if there
# is no default index page present for the root URL. To disable the
# Welcome page, comment out all the lines below.
#
# NOTE: if this file is removed, it will be restored on upgrades.
#
#<LocationMatch "^/+$">
#  Options -Indexes
#  ErrorDocument 403 /.noindex.html
#</LocationMatch>
#<Directory /usr/share/httpd/noindex>
#  AllowOverride None
#  Require all granted
#</Directory>
#Alias /.noindex.html /usr/share/httpd/noindex/index.html
httpd 文件配置如下所示:
<Directory "/var/www/html">
  #
  # Possible values for the Options directive are "None", "All",
  # or any combination of:
  #  Indexes Includes FollowSymLinks SymLinksifOwnerMatch ExecCGI MultiViews
  #
  # Note that "MultiViews" must be named *explicitly* --- "Options All"
  # doesn't give it to you.
  #
  # The Options directive is both complicated and important. Please see
  # http://httpd.apache.org/docs/2.4/mod/core.html#options
  # for more information.
  #
  Options indexes FollowSymLinks
  #
  # AllowOverride controls what directives may be placed in .htaccess files.
  # It can be "All", "None", or any combination of the keywords:
  #  Options FileInfo AuthConfig Limit
  #
  AllowOverride None
  #
  # Controls who can get stuff from this server.
  #
  Require all granted
</Directory>
Options indexes FollowSymLinks
这个配置表明为 开启目录权限
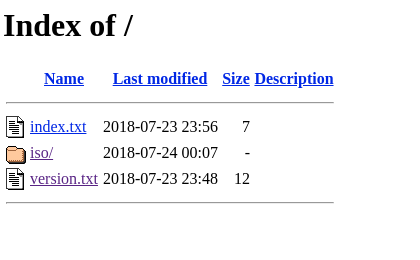
结束后,你会看到如下所示画面:

总结
以上所述是小编给大家介绍的fedora 开启 apache 并 开启目录浏览模式,希望对大家有所帮助,如果大家有任何疑问请给我留言,小编会及时回复大家的。在此也非常感谢大家对脚本之家网站的支持!
